Your go-to resource for expert insights and carefully curated professional advice. Plan your renovation with confidence and ease
Bathroom Edition — Part 2: Roll Up Your Sleeves — Let’s Renovate
25.08.2025, 19:04 GMT Views: 847 Likes: 22
Step-by-step guide to renovating your bathroom.

Renovating a bathroom involves more than replacing old tiles; it requires following a clear sequence of stages, each building on the last. Understanding this process empowers homeowners to communicate confidently with contractors, anticipate challenges, and make informed decisions.
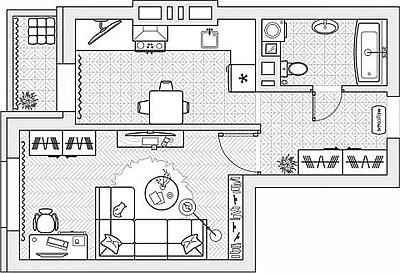
This article complements Part 1 of our series, focused on bathroom design and planning. If you haven’t read it yet, start there to get inspiration, test layouts, and create coordinated technical drawings before the first hammer swings.
Step 1 — Demolition and Preparation
Remove old fixtures, tiles, and cabinets. Inspect walls, floors, and ceilings for structural issues. A clean, solid foundation ensures that subsequent work is long-lasting. Take photos and notes of existing plumbing and wiring, which helps avoid surprises later.
Step 2 — Waterproofing
Apply a high-quality waterproofing membrane to floors and walls, particularly in wet zones. Skipping this step can lead to leaks, mold, and costly damage.

With Remplanner, an online interior and renovation planning program beloved by homeowners and professional designers, you can visualize precisely which areas require waterproofing, minimizing errors and ensuring coverage in every critical spot.
Step 3 — Rough Finishing and Plastering
Level and smooth walls and floors. Plastering provides a perfect surface for tiling and painting. Even minor unevenness can cause tiles to appear crooked, so take time here.
Step 4 — Installing Plumbing and Electrical Systems
Position pipes, drains, and electrical wiring according to your plan. This includes lighting points, outlets, and water connections. Remplanner can produce a full set of professional technical drawings based on your layout design. These include plumbing layouts, electrical schematics, and ventilation plans, ensuring systems work together without conflict and facilitating precise communication with contractors.
Step 5 — Tiling and Wall Finishes
Install floor and wall tiles with care, checking alignment and pattern consistency. Order extras to allow for future repairs or mistakes. Properly executed tiling dramatically affects the bathroom’s visual appeal and durability.

Step 6 — Installing Fixtures and Furniture and Finishing Touches
Fit bathtubs, showers, sinks, toilets, and cabinetry. Proper placement ensures functionality, comfortable movement, and aesthetic balance.
Then, seal all joints with silicone, paint exposed areas, and install mirrors, lighting, and accessories. Small details create a polished, professional look.
Step 7 — Review and Handover
Inspect the finished renovation thoroughly: check water flow, drainage, and tile alignment. Address any issues immediately to ensure quality.
Confidence Through Knowledge
Following these steps gives a clear mental picture of the renovation process. Combined with Remplanner’s automatically generated technical plans, you can communicate effectively with contractors, manage budgets, and avoid costly misunderstandings.
Renovating a bathroom is an investment in comfort and home value. With careful planning, the right tools, and knowledge of the process, the project becomes smoother, more transparent, and ultimately rewarding.
 Antonella
Marconi