Your go-to resource for expert insights and carefully curated professional advice. Plan your renovation with confidence and ease
How to Create a DIY Interior Design: A Simple 5-Step Guide
26.03.2025, 14:22 GMT Views: 886 Likes: 27
This guide breaks down home or commercial space design into five easy and approachable steps, so it doesn't feel overwhelming anymore.

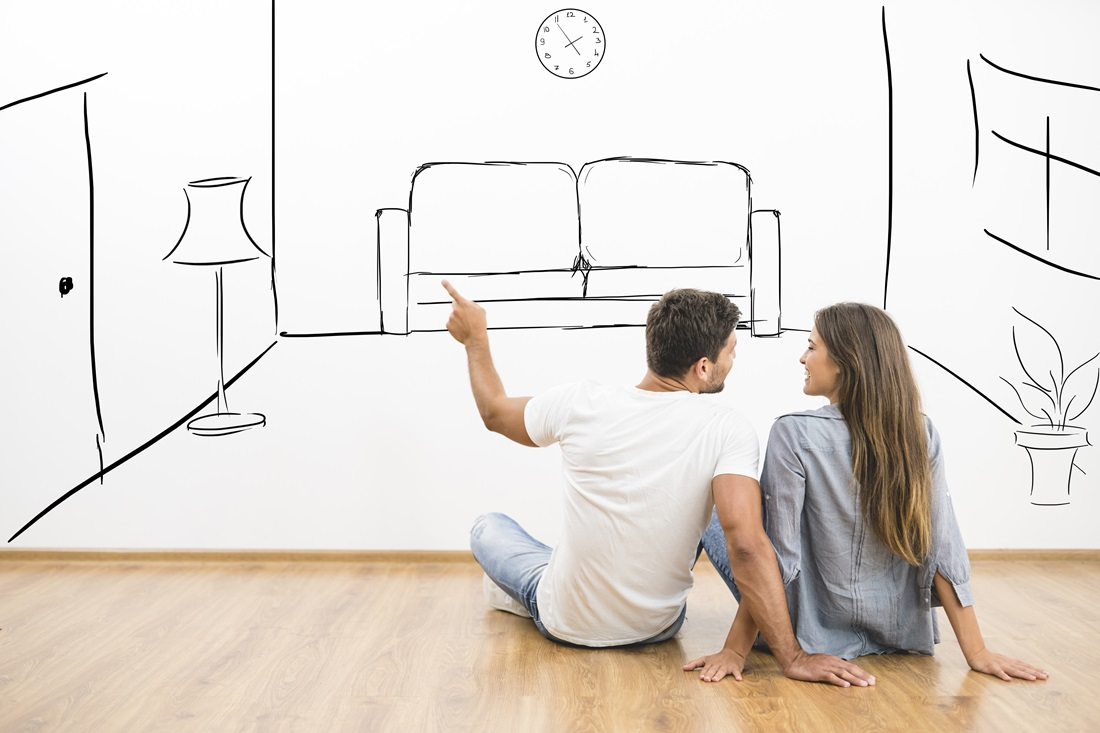
Designing your own space can feel overwhelming, especially if you're not a professional designer. But here’s the secret: with a structured approach and the right tools, anyone — even a beginner — can do it beautifully.
In this guide, we’ll take you through five simple, yet essential steps to create a professional-quality interior on your own. From taking the first measurements to finalizing your 3D visualization, you’ll see just how easy it is to bring your vision to life.
With RemPlanner, a professional yet easy-to-use online tool, you can design, visualize, and perfect your space — without the need for complex software or professional training. Let us show you how to navigate each step with ease and confidence.
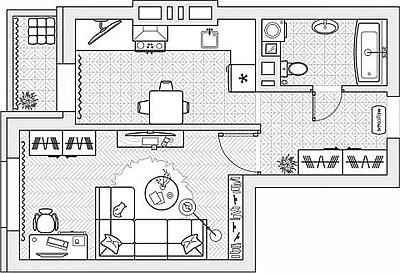
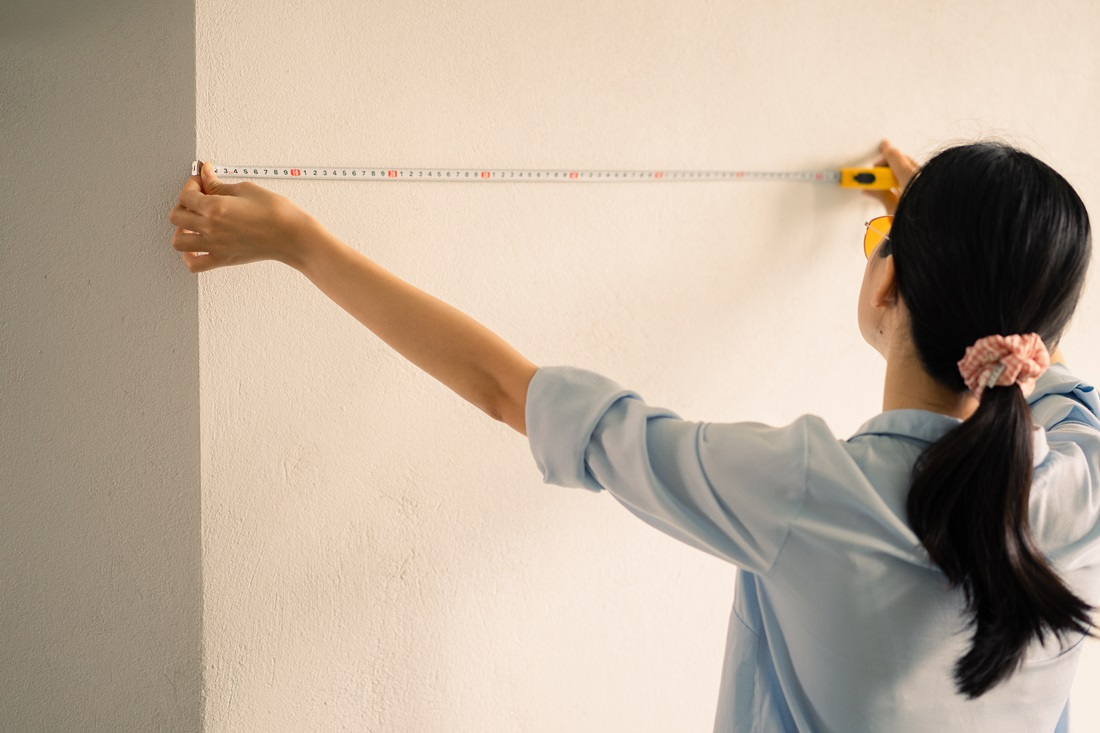
Step 1: Measure Up & Create Your Floor Plan
The first step in any design project is understanding the space you're working with. This means measuring everything — walls, windows, doors, ceiling heights, and any architectural features. Getting the measurements right is crucial, as even small errors can cause problems with furniture placement and layout.
How to do it:
-
Measure the length, width, and height of each room.
-
Measure and note the locations of windows, doors, and any fixed architectural elements.
-
Identify plumbing, radiators, and electrical points that cannot be easily moved.
With RemPlanner, you can input these dimensions to create an accurate digital floor plan. The planner allows you to adjust wall lengths, mark key structural features, and ensure your design starts with precise data. The best part? If you want to make adjustments, it's as simple as a few clicks.
Having a detailed base plan will help you avoid miscalculations and make the next steps much easier.
Step 2: Plan Your Layout & Define Zones
A well-planned layout improves functionality and makes daily life more comfortable.
Now that you have your floor plan, it's time to think about how the space will flow. This means defining functional zones, deciding if you need to add or remove partitions, and organizing the furniture.
RemPlanner makes this process incredibly easy — you can move walls around virtually, test different layouts, and find the perfect balance between aesthetics and functionality.
Key considerations:
- Identify the main functions of the space (e.g., sleeping, working, relaxing).
- Ensure a logical flow of movement between different areas.
- If needed, plan where new partitions or dividers might be useful.
- Make sure furniture placement doesn’t block natural light or make the room feel cramped.
With RemPlanner, you can easily experiment with different layouts. The drag-and-drop functionality makes it simple to adjust furniture placement, add or remove walls, and fine-tune your design until it fits your vision perfectly.
Step 3: Plan Electrical Outlets and Lighting
Great design isn’t just about aesthetics — it’s about practicality too. Proper placement of electrical outlets and lighting is essential for creating a comfortable environment.
What to plan:
- Make sure outlets are placed where you will need them most (near workspaces, bedside tables, TV areas, etc.).
- Choose the right lighting for each area: ambient lighting for general illumination, task lighting for work areas, and accent lighting for decorative effects.
- Consider smart home options, such as dimmable lights or motion-activated switches.
Once your outlets and lighting are set, RemPlanner lets you plan the electrical wiring effortlessly. You can easily connect outlets, switches, and light fixtures, ensuring everything is properly linked. The tool allows you to draw wiring paths along walls, ceilings, or floors and track cable lengths. This provides you with a smooth, efficient electrical setup before finalizing your design.
Step 4: Choose Finishes for Floors, Walls, and Ceiling
Now that the technical aspects are covered, it’s time to focus on the aesthetics of your space. Choosing the right materials and colors for floors, walls, and ceilings will define the style and atmosphere of your interior.
Tips for selecting finishes:
- Choose durable and easy-to-maintain flooring materials, such as laminate, hardwood, or tiles.
- Consider using neutral tones for walls and adding color through accents and decor.
- Don’t forget the ceiling—it can be enhanced with features like wooden beams, decorative moldings or interesting textures.
Not sure how different finishes will pair? With RemPlanner, you can preview textures and colors in a digital 3D model, helping you visualize the final look before making a decision. Moreover, the tool also generates detailed wall elevation drawings and calculates all the materials needed with precision.
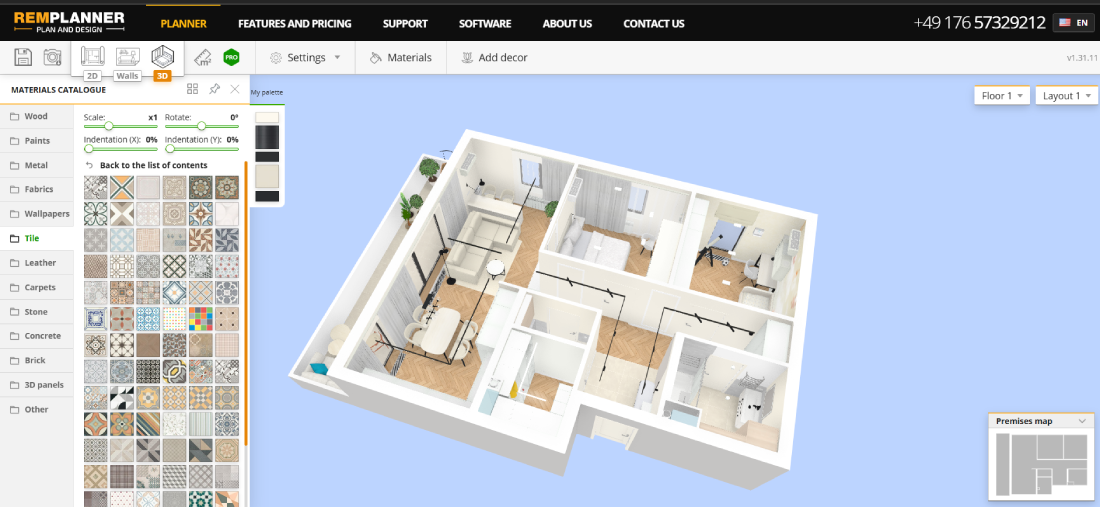
Step 5: Visualize Your Design
The final step in creating your DIY interior design project is bringing everything together in 3D visualization. While the structural elements remain in the 2D planning phase, this 3D visualization step is where you perfect the final details. Think of it as your last chance to tweak anything before bringing your design to life.
Why 3D visualization is important:
- It helps you spot potential design issues before implementation.
- You can experiment with different furniture arrangements, color schemes, and decor styles.
- It provides a clear presentation of your project, which is useful if you plan to hire professionals for execution.
RemPlanner’s advanced rendering lets you generate high-quality 3D models and even take virtual walkthroughs of your design. This allows you to step back and evaluate your plan with a fresh perspective, making certain that your design is functional and well-balanced.
Your DIY Project Is Ready!
And just like that, your design is complete! By following these five steps, you have created a well-planned, beautifully designed space. Now, you have everything you need to bring it to life — whether it’s sharing your plans with contractors or discussing details with friends.

With RemPlanner, every detail is precise, every choice intentional, and the entire process effortless. It is your shortcut to a flawless, designer-quality result. Designing your dream space isn’t just possible — it’s an exciting journey.
So go ahead — get creative, have fun, and design a space you truly love!
 Antonella
Marconi