Your go-to resource for expert insights and carefully curated professional advice. Plan your renovation with confidence and ease
Light It Right: A Complete Guide for Designing Home Lighting
20.05.2025, 07:48 GMT Views: 724 Likes: 41
Lighting Your Apartment: Designing the Perfect Atmosphere at Home.

Lighting is often called the invisible architecture — a design element that is felt before it’s seen. It sculpts space, evokes emotion, and brings interior design to life. Yet, despite its transformative power, lighting is frequently overlooked or treated as an afterthought. A well-designed room without proper lighting can feel flat or lifeless, while even the most minimalistic space can radiate warmth and sophistication when illuminated with intention.
And here’s the good news — you don’t need to be a professional designer to make it work. With some thoughtful planning, anyone can create a cozy, functional, and stylish apartment lighting scheme. This guide walks you through the key steps to designing lighting that truly serves your space — and your well-being.
1. Start With Purpose — and Emotion
Lighting is not just about what we see — it’s about how we feel.
Cold, flat light can drain energy or trigger anxiety, while warm, layered light promotes calm, focus, or playfulness. This is especially important in homes with children, who are highly sensitive to lighting changes and often need different light settings for sleep, study, and play.
Begin your plan by identifying how each room is used throughout the day. Think through all daily routines — from morning coffee in the kitchen to late-night reading in bed — and note areas that need brightness, softness, or a touch of drama. This emotional and functional mapping is the foundation of good lighting.
2. Embrace the Power of Layers
Designers use a layered lighting approach — and so should you. This means combining following: ambient lighting, task lighting, and accent lighting. Let’s dive in to understand what each of these really means — and how to make them work together in your home.
Ambient lighting — the main source of general illumination
This is the foundation of any lighting plan. Ambient lighting provides overall illumination and ensures that a room is usable and safe. It’s the light you switch on when you enter a space — the soft glow that fills the room and allows everything else to function.
Examples include:
- Ceiling-mounted fixtures like pendants or chandeliers
- Recessed downlights or LED panels
- Cove lighting or perimeter LEDs
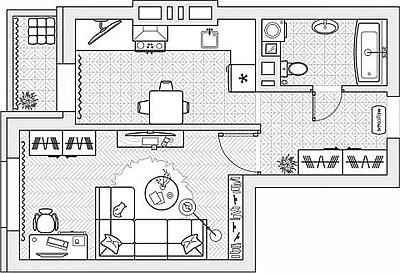
Planning tip: Place ceiling fixtures thoughtfully. For example, if you hang a pendant above your dining table, make sure it’s centered — this avoids awkward shadows from your own head and ensures the food is beautifully lit. In open areas, use multiple sources spaced evenly rather than relying on a single light point.
Task lighting — directed light for specific activities like reading, cooking, or working
Task lighting supports focused activities and helps reduce eye strain. Whether you’re chopping vegetables, reading in bed, or applying makeup, the right task light makes all the difference.
Examples include:
- Desk lamps
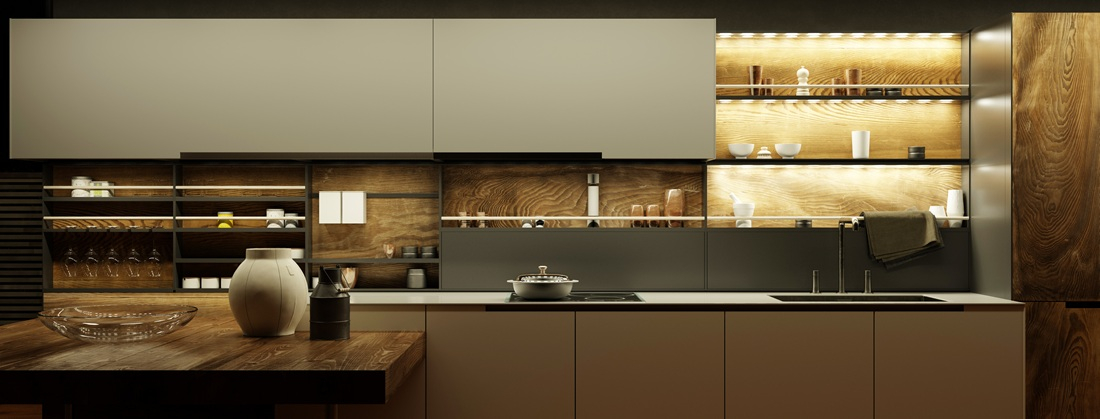
- Under-cabinet kitchen lighting
- Vanity lights in the bathroom
- Adjustable bedside lamps
The light should be directed and shadow-free. For example, under-cabinet lighting in the kitchen eliminates shadows cast by overhead fixtures. For task lighting, clarity and focus are key — so aim for brightness and positioning that serve your activity, without glare or harsh contrast.
Planning tip: When placing lights for tasks, think about the position of your body. A kitchen light installed behind you can cast your shadow over the counter. Instead, place under-cabinet lights closer to the wall to keep work surfaces bright and clear. At your desk, position your lamp on the opposite side of your writing hand to avoid shadows.
Don’t forget functional lighting
Not all task lighting is about reading or working — some of it is about small, practical moments. This is where functional lighting comes in:
- LED strips inside kitchen drawers or wardrobes
- Motion-activated lights inside closets or cabinets
- Toe-kick lights under bathroom vanities or beds for nighttime navigation
- Interior lighting in mirror cabinets
These fixtures may be small and often hidden, but they dramatically improve everyday usability and comfort — especially in dark corners or deep storage areas.
Planning tip: Think about what you reach for in the dark — towels, slippers, clothes, snacks. Add subtle light in those spots. Motion sensors are great here: no fumbling for switches. Just opening a door or stepping near the zone should activate a soft, helpful glow.
Accent lighting — used to highlight architectural details, textures, art, or add atmosphere
Accent lighting is decorative and emotional. It highlights architectural features, art, textures, or even plants. It creates mood, drama, and visual interest.
Examples include:
- Wall sconces that wash a wall with light
- Picture lights over artwork
- LED strips inside shelves or behind TVs
- Uplights behind furniture or plants
- Spotlights directed at sculptures or textured walls
Accent lighting is not about brightness — it’s about contrast. Use it to break the uniformity of general lighting. It’s perfect for creating a layered, luxurious feel — even in small spaces. Combine accent light with dimmable ambient lighting for maximum effect.
Planning tip: Avoid overdoing it — highlight only one or two focal points per room. A painting, a textured wall, or a display shelf is enough. And make sure the angle of the spotlight doesn’t create glare or unwanted reflections — especially on glass or glossy surfaces.
Even in small apartments, layers matter. A single ceiling light creates a flat, uniform effect. But add a table lamp, some under-cabinet LEDs, or a pendant over the table — and suddenly, the room gains depth, focus, and charm.
And Don’t forget about dimmers! They’re an easy way to transform the same space from bright and active to soft and intimate. Installing dimmable switches allows you to adjust the mood of any room in seconds — from a bright morning boost to a cozy evening unwind.
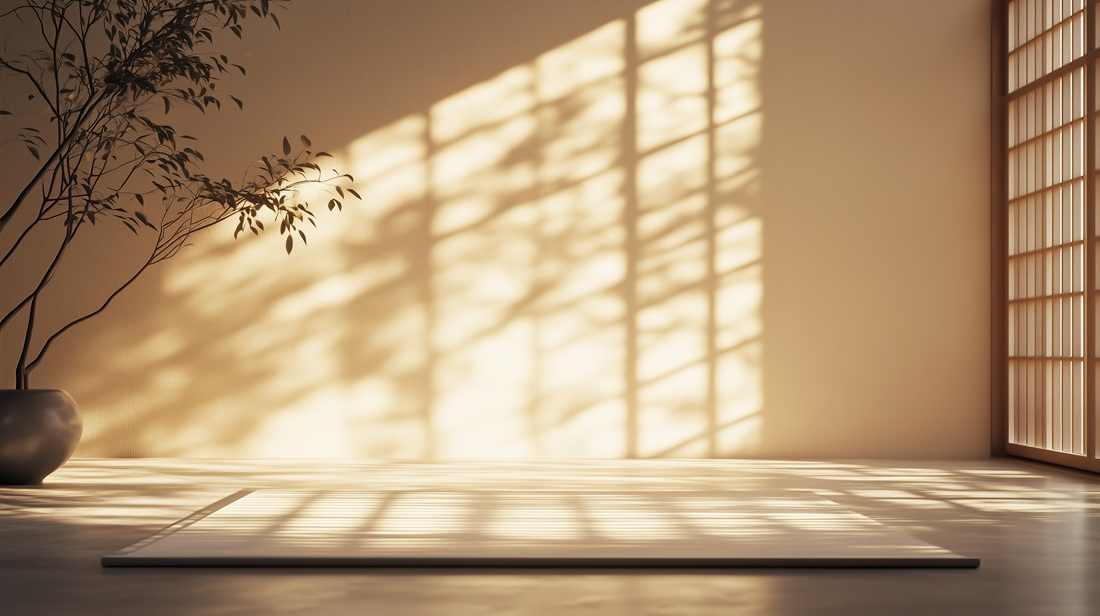
3. Respect and Enhance Natural Light
Harnessing sunlight is one of the most sustainable and emotionally rewarding aspects of interior design.
Begin by observing how natural light flows through your home during the day. Which rooms get morning sun? Where is it dim and shadowy? South-facing windows usually offer the warmest and most consistent daylight, while north-facing rooms may need artificial help — especially during the darker months.
If you’re lucky enough to live in a sunny region, you can also borrow techniques from professional architects: use wooden slats, decorative screens, or architectural louvers to diffuse intense sunlight. These solutions soften harsh rays at noon, help balance the temperature, and add elegant textures and shadows to the space — all while acting as subtle decorative elements.
To enhance natural light:
- Use sheer curtains instead of heavy drapes
- Opt for light-colored finishes on walls and furniture
- Add mirrors or reflective surfaces to bounce daylight deeper into the room
Natural light is your friend — it’s dynamic, free, and beneficial for both mood and circadian rhythm.
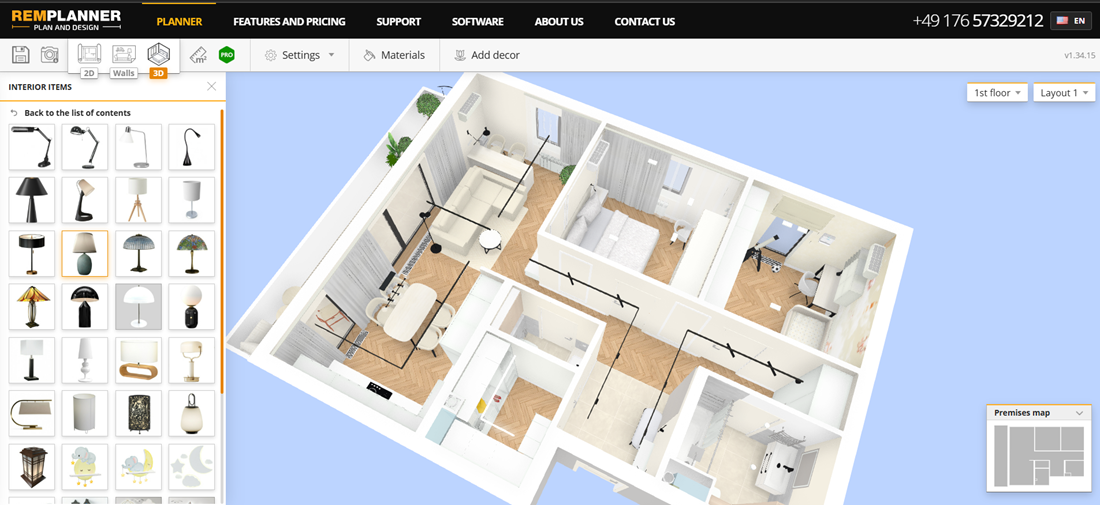
4. Make a Lighting Plan — or Let Remplanner Do It for You
You can start your lighting plan with a simple sketch — just mark the rooms, furniture, and windows. But let’s be honest: planning on paper can get messy fast.
That’s why it’s so much easier to do it in Remplanner – a renovation planner software designed for homeowners however loved by designers and architects just as much.
This user-friendly tool helps you:
- Build a clear visual layout
- Add lights, sockets, and switches
- And most importantly — it automatically generates all the essential plans you might forget: the socket plan, lighting scheme, switch map, and more, tailored exactly to your space.
Even if you’re new to interior planning, Remplanner makes the whole process incredibly easy — and helps you avoid critical mistakes before they happen.
Pro tip: Don’t forget to thoughtfully map out switch positions. It’s important to be able to turn off bedroom lights from both the door and bedside, or to control kitchen zones separately — especially in open-plan spaces.
5. Choose the Right Bulbs for the Right Mood
Once you know where the lights go, it’s time to decide what kind of light they should provide.
Pay attention to:
- Color temperature: Measured in Kelvins.
- 2500K–3000K = warm, soft, relaxing (ideal for bedrooms and lounges)
- 3000K–4000K = cool, crisp, focused (can be an option for kitchens, bathrooms, and desks)
- Brightness: Measured in lumens, not watts
- A reading nook needs ~400–500 lumens
- General room lighting might total 2000–3000 lumens
- CRI (Color Rendering Index): A CRI of 90+ shows colors more naturally, especially important for closets, bathrooms, or anywhere you choose clothing
Important note for bathrooms and wet zones: In areas exposed to moisture — such as bathrooms, laundry rooms, or above kitchen sinks — use only fixtures and bulbs with adequate moisture protection. Look for those rated IP44 or higher:
- IP44 means protected against splashing water — suitable for most bathroom zones
- IP65 and higher are recommended for direct contact with water, like above a shower or inside a walk-in wet area
This protects both your home and your safety — and extends the life of your fixtures.
Choose LED bulbs wherever possible. They’re energy-efficient, long-lasting, and many now offer smart features — letting you adjust warmth and brightness from your phone or voice assistant.
6. Style Meets Substance — Fixtures That Work and Wow
Lighting fixtures aren’t just technical — they’re part of your aesthetic. From elegant chandeliers to minimal track lighting, your choices help define the look and character of the space.
Consider:
- Scale — A small lamp on a big table might feel lost, while an oversized pendant in a low room can overwhelm
- Material — Brass, matte black, glass, wood — lighting materials should complement the room’s palette and style
- Balance — Not all fixtures need to be dramatic. Mix statement pieces with neutral ones for a cohesive look
Not sure where to start? The Remplanner catalog includes a wide range of lighting fixture options. You can test different styles within your plan — mix and match, move elements around, and instantly visualize how it all comes together.
It saves you the guesswork and helps avoid those awkward “it looked better in the store” moments.
Final Thought: Light Is the First Layer of Home
When you plan your apartment lighting with intention, you’re doing more than installing bulbs — you’re shaping how you live, feel, and connect with your space.
Light affects your emotional state, your sleep cycles, your productivity, your comfort. And when done thoughtfully, it becomes your home’s quiet guide — adapting to your day, supporting your habits, and elevating your mood.
So take your time. Start with the atmosphere you want. Sketch it out — and let light lead the way. Everything else will follow.
Bonus: 6 Common Lighting Mistakes to Avoid
Even the best intentions can be undone by simple missteps. Here’s a quick checklist of common mistakes — so you can dodge them from the start:
- Relying on one central ceiling fixture — creates flat, uninspiring light. Add layers!
- Skipping dimmers — light that's too bright or too harsh ruins the atmosphere.
- Wrong bulb temperature — cold light in the bedroom or warm light in a home office can sabotage both sleep and productivity.
- Forgetting switch placement — nothing’s worse than crossing a dark room to turn off the lights.
- No lighting inside storage — wardrobes, pantries, and cabinets need their own light to be functional.
- Choosing style over function — a trendy fixture that doesn’t light the room well ends up being just… decoration.
 Antonella
Marconi