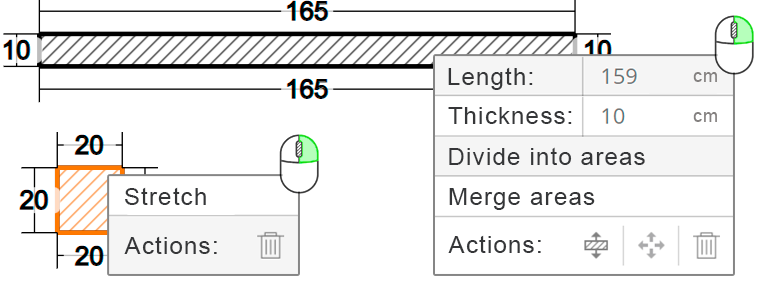
To call up the control menu for a wall or any other element, click on it with right mouse button or double left click.
Got it, continue
Note! It's important!
Draw existing walls and front walls STRICTLY ON THE ORIGINAL PLAN, use the partition plan only for interior walls.
Got it, continue
Note! It's important!
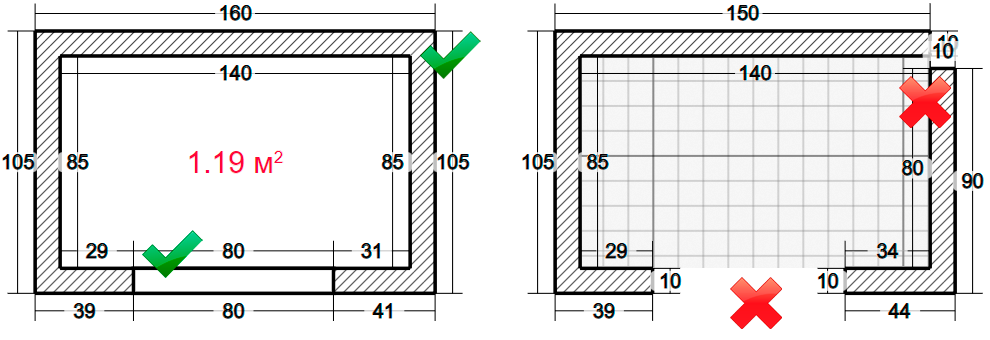
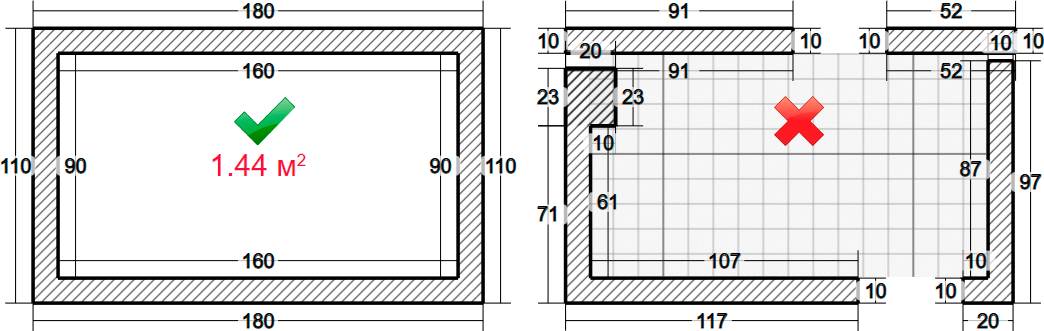
Be sure to close the contour of the rooms, and put doors and windows on top of the walls. Otherwise, you will not be able to fill the other sheets in the project.
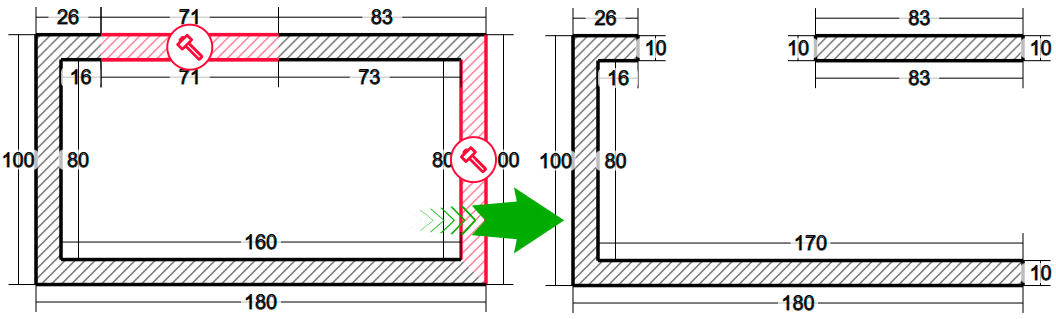
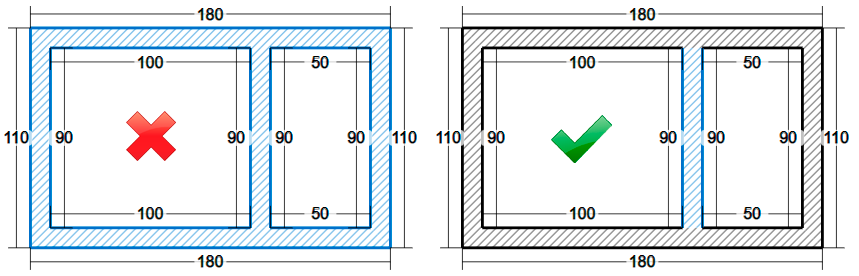
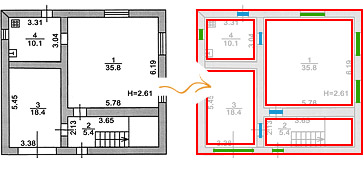
 Dock the walls together,
no "gaps" and overlays!
Don't leave holes for openings!
Even if there is no door, put
"an opening without a door" on top of the wall
Got it, continue
Note! It's important!
Be sure to close the contour of the rooms so that a continuous, white-filled floor without ?slots? and ?holes? is formed inside.
Got it, continue
Note! It's important!
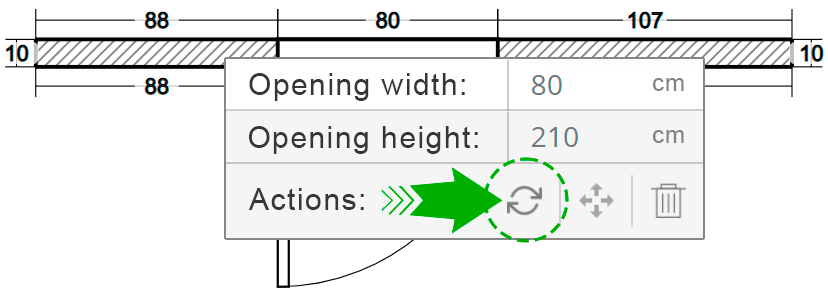
To change the door opening, click on it with the right button or with a double left click, then press the specified button.
Got it, continue
Door opening setting
There are three different ways to move a drawing around the screen:
1 holding and moving the left mouse button;
2 by keyboard arrows;
3 virtual arrows in the lower right corner of the app window.
You can change the scale of the drawing with the mouse wheel.
Got it, continue
Move drawings
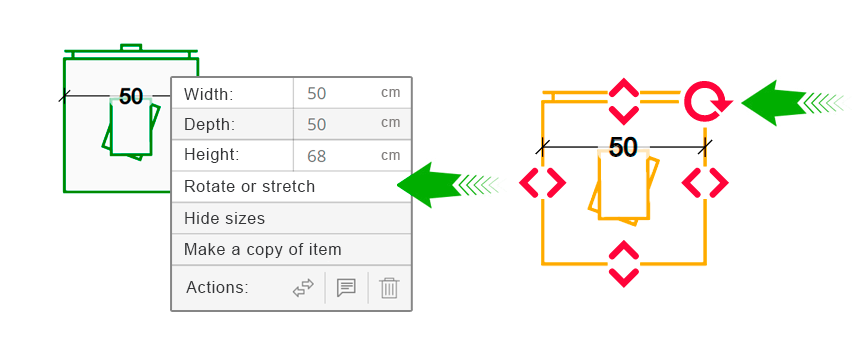
To rotate an item, click on it using right mouse button or move left click, then select "rotate or stretch".
Got it, continue
Rotate objects
To set the height of ceilings/walls, click on the question mark in any room in the project and specify its value in the menu that appears.
Note! Ceiling heights are set for ALL rooms at once. It is not possible to set different heights in different rooms.
Got it, continue
Ceiling height
To name a room, click on the question mark in it and enter a name in the menu that appears.
Got it, continue
Name of rooms
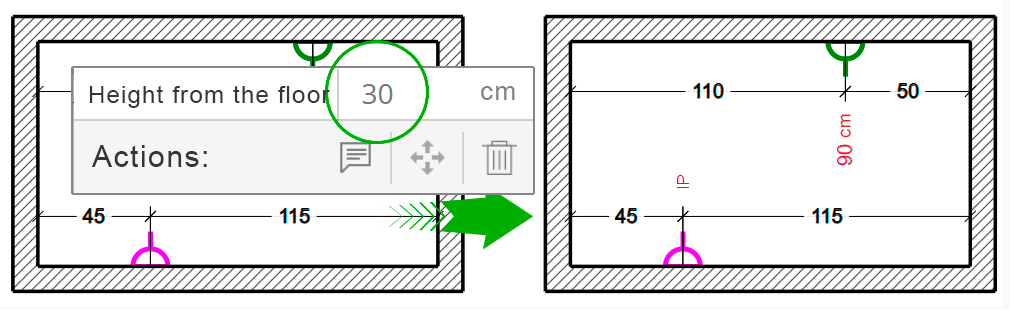
To set the height of the electric points, open the menu of the desired element by clicking on it using right mouse button or with left click.
Got it, continue
Adjusting the height from the floor
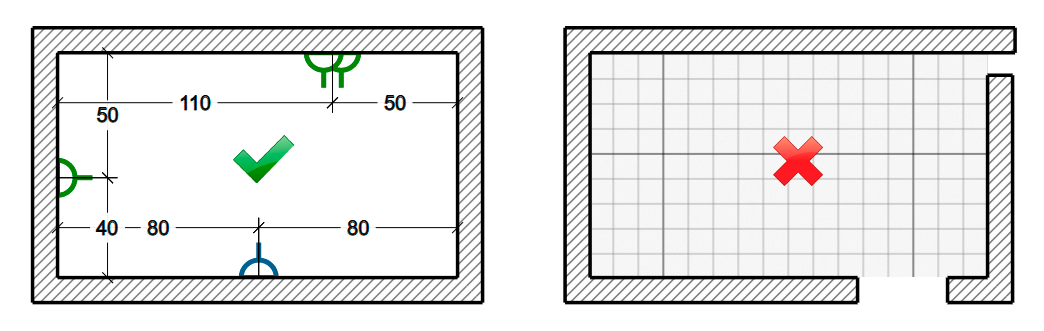
Sockets and switches can be combined into groups. To do this, move the cursor with the element to be added to an already installed socket or group. As soon as the new element gets into the group, fix it with the left mouse click.

Got it, continue
Grouping electrical outlets
| Keyboard arrows |
Moving around the drawing, moving the item (if it is selected) |
| Mouse wheel |
Change the scale of drawings |
| Esc |
Turn off the active tool |
| Del |
Delete selected item |
| Ctrl + C |
Copy an object (furniture, plumbing) |
| Ctrl + Z |
Undo last action (back) |
Got it, continue
Keyboard shortcuts in the app
Start with building a wall Click on the icon to the left of the tooltip!
To turn off the tool
press Esc on the keyboard or
the right mouse button.
The Opera browser has built-in mouse gestures. They can interfere with the software! Turn them off before you start.
instruction Hide
Change scale and position of drawings with these buttons, mouse wheel or keyboard arrows.
Stretch items in drawings by
holding down and dragging the arrow icons in the desired direction.
 Drag the icon
in the desired direction
Draw walls by holding down the left mouse button and releasing it at the end point.
Press Alt on the keyboard to remove the ruler after measuring
Use the arrow keys on the keyboard to move the object precisely
Hold Shift for quick placement of an item in multiple locations
Click on any room to open its elevation view
The object has been successfully copied to the clipboard.
Place the cursor in the desired location and press Ctrl+V to paste it.
Step 1. Adjust plan scale
In order for the software to correctly calculate your drawing, you must specify either the size of any one distance in the picture or the area of any of the rooms.
Specify area
Specify distance
Step 2. Select any room
Move the orange rectangle by dragging its corners with the mouse so that the resulting shape matches any room whose area is known.
Then specify its area:
Step 2. Mark the distance on the drawing
Move the green ruler by dragging its ends so that the ruler matches any distance indicated on the picture.
Then specify this distance:
Step 3. Circle walls, doors and windows
Using the toolbar on the left side, outline all the walls of the apartment with lines, marking the door and window openings with the appropriate markers.
back to scaling
После того, как вы всё сделаете, запустите распознавание.
 en
en ua
ua id
id cs
cs de
de es
es fr
fr hu
hu it
it nl
nl pl
pl pt
pt ro
ro sv
sv tr
tr